DOOR / HATCH BACK DOOR SUPPORT REMOVAL
CAUTION / NOTICE / HINT
- HINT:
- ·
Use the same procedure for the RH and LH sides.
·Use the same procedure described for the LH side.
PROCEDURE

 68960
1.REMOVE BACK DOOR STAY ASSEMBLY LH
68960
1.REMOVE BACK DOOR STAY ASSEMBLY LH
- CAUTION:
-

- ·
Do not perform work if the back door is not securely supported.
·The back door could fall, resulting in injury.
- NOTICE:
- ·
Avoid touching the piston rod as much as possible to prevent foreign matter from attaching to it. Be sure to hold the cylinder while servicing.
·Do not wear cotton gloves or other similar materials when handling the piston rod. Fibers may attach to the rod and result in gas leaks.
·Do not apply any horizontal load to the door stay in order to prevent the piston rod from deforming.
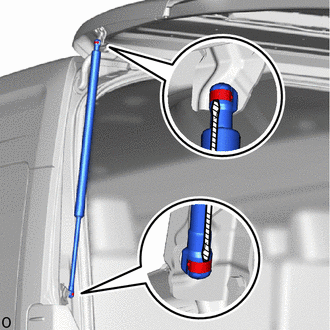

|
Protective Tape |
Using a thin-bladed screwdriver with its tip wrapped in protective tape, slightly raise the 2 stop rings as shown in the illustration.
- NOTICE:
- ·
Do not remove the stop rings from the back door stay assembly. Raise the stop rings just enough to allow the ball joints to be disengaged.
·Do not reuse the back door stay assembly if a stop ring has been removed.
Detach the 2 ball joints and remove the back door stay assembly LH.
- NOTICE:
-
Remove the back door stay assembly LH while holding it to prevent the back door from closing.
68946
2.REMOVE BACK DOOR UPPER DAMPER STAY BRACKET LH

Remove the 2 bolts and back door upper damper stay bracket LH.
68948
3.REMOVE BACK DOOR LOWER DAMPER STAY BRACKET LH
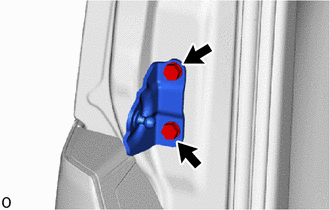
Remove the 2 bolts and back door lower damper stay bracket LH.