HYBRID / BATTERY CONTROL INVERTER WITH CONVERTER DISASSEMBLY
CAUTION / NOTICE / HINT
| Procedure | Part Name Code | 
|

|

|
|
|---|---|---|---|---|---|
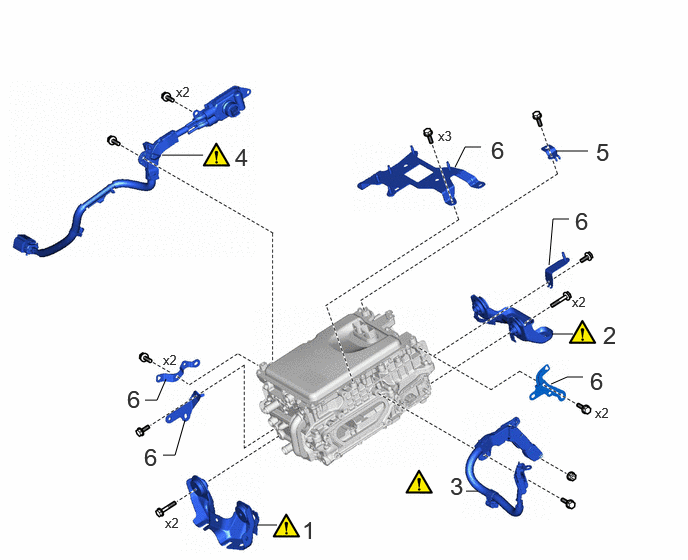
| 1 | NO. 1 INVERTER BRACKET | G9214 | ( 202307,999999,_51,_144957,_0604245,RM100000002BTRG_01_0001,) 202307,999999,_51,_144957,_0604245,RM100000002BTRG_01_0001,)
|
- | - |
| 2 | NO. 2 INVERTER BRACKET | G9215 | (202307,999999,_51,_144957,_0604245,RM100000002BTRG_01_0002,)
|
- | - |
| 3 | NO. 3 ENGINE WIRE | 82123 | (202307,999999,_51,_144957,_0604245,RM100000002BTRG_01_0006,)
|
- | - |
| 4 | HIGH VOLTAGE AIR CONDITIONING WIRE | 821H2A | (202307,999999,_51,_144957,_0604245,RM100000002BTRG_01_0005,)
|
- | - |
| 5 | BRACKET | 23211K | - | - | - |
| 6 | WIRE HARNESS CLAMP BRACKET | - | - | - | - |
PROCEDURE

 G9214
1.REMOVE NO. 1 INVERTER BRACKET
G9214
1.REMOVE NO. 1 INVERTER BRACKET
|
|
|
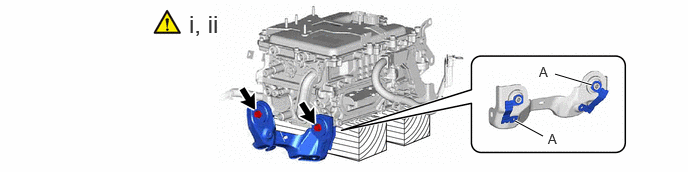
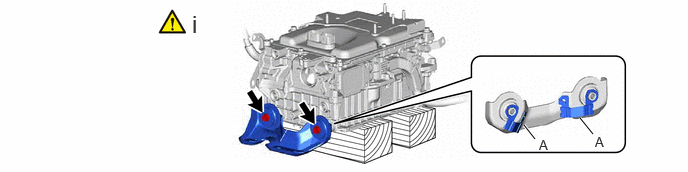
Set the inverter with converter assembly on wooden blocks.
Remove the 2 bolts and No. 1 inverter bracket from the inverter with converter assembly.
- NOTICE:
-
Do not touch portion (A) of the No. 1 inverter bracket.
G9215
2.REMOVE NO. 2 INVERTER BRACKET
Remove the 2 bolts and No. 2 inverter bracket from the inverter with converter assembly.
- NOTICE:
-
Do not touch portion (A) of the No. 2 inverter bracket.
82123
3.REMOVE NO. 3 ENGINE WIRE
|
|
|
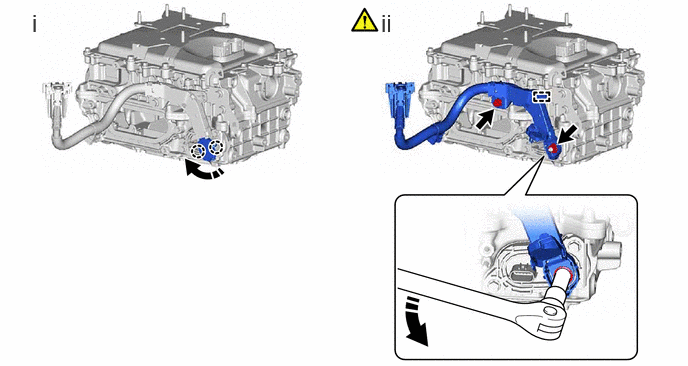
Disengage the 2 claws and open the cover.
Remove the bolt, nut, clamp and disconnect the no. 3 engine wire from the inverter with converter assembly.
- NOTICE:
-
Move the tool in the downward direction to loosen the nut as shown in the illustration.
821H2A
4.REMOVE HIGH VOLTAGE AIR CONDITIONING WIRE
|
|
|
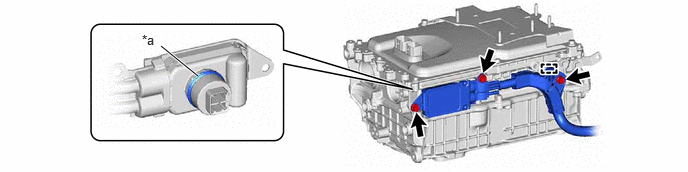
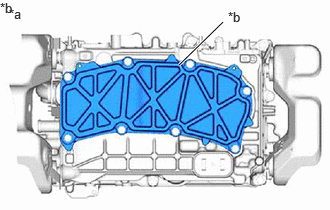
| *a | Waterproof Seal | - | - |
23211K
5.REMOVE BRACKET

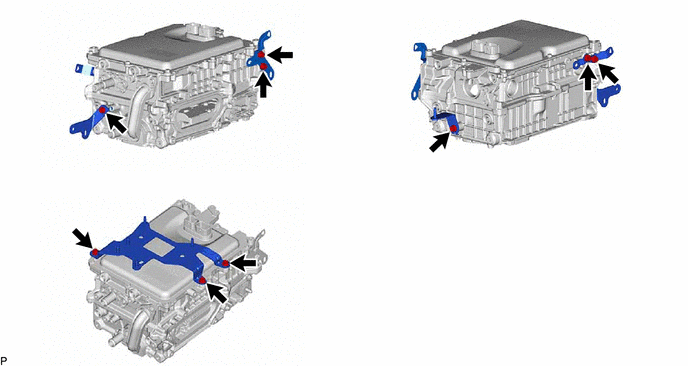
6.REMOVE WIRE HARNESS CLAMP BRACKET