SUPPLEMENTAL RESTRAINT SYSTEMS AIRBAG SYSTEM OPERATION CHECK
PRECAUTION FOR OPERATION CHECK
- CAUTION:
-
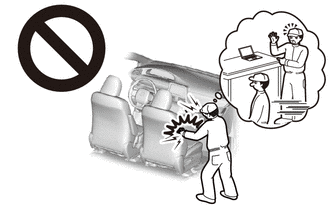
- ·
Be sure to read Precaution thoroughly before servicing.
·Be sure to correctly follow the removal and installation procedures for the SRS parts.
- NOTICE:
-
If there is any damage or deformation of airbag installation components or the areas they are installed to, do not attempt to repair them. Replace the damaged components with new ones.
CHECK SRS WARNING LIGHT

Primary check
Turn the ignition switch to ON and check that the SRS warning light turns on.
Turn the ignition switch off. Wait for at least 2 seconds, then turn the ignition switch to ON. The SRS warning light comes on for approximately 6 seconds and diagnosis of the airbag system is performed.
- HINT:
- ·
If the SRS warning light remains on for approximately 6 seconds or more after the ignition switch has been turned to ON, there may be a malfunction in the SRS airbag system.
·If the SRS warning light occasionally turns on approximately 6 seconds or more after the ignition switch has been turned to ON, there may be a short to +B, short to ground or an open in the SRS warning light circuit.
·If the SRS warning light illuminates after turning the ignition switch off or to ACC, there may be a malfunction in the power source circuit or combination meter assembly.
·The SRS warning light turns off, and then turns on. This blinking pattern indicates a power source voltage drop. The SRS warning light turns off 6 to 10 seconds after the power source voltage returns to normal.
INSPECT AIRBAG COMPONENTS
Inspect the SRS parts in table below.
| Component to Inspect | Procedure |
|---|---|
| Horn button assembly | 1.
Perform a diagnostic system check. 2.
Visually check for defects with the horn button assembly installed to the vehicle.
If any defects are found, replace the horn button assembly with a new one. |
| Lower No. 1 instrument panel airbag assembly | 1.
Perform a diagnostic system check. 2.
Visually check for defects with the lower No. 1 instrument panel airbag assembly installed to the vehicle.
If any defects are found, replace the lower No. 1 instrument panel airbag assembly with a new one. |
| Instrument panel passenger without door airbag assembly | 1.
Perform a diagnostic system check. 2.
Visually check for defects with the instrument panel passenger without door airbag assembly installed to the vehicle.
If any defects are found, replace the instrument panel safety pad assembly with a new one. |
| Curtain shield airbag assembly | 1.
Perform a diagnostic system check. 2.
Visually check for defects with the curtain shield airbag assemblies installed to the vehicle.
If any defects are found, replace each pillar garnish or the roof headlining assembly with a new one. |
| Front seat airbag assembly | 1.
Perform a diagnostic system check. 2.
Visually check for defects with the front seat airbag assemblies installed to the vehicle.
If any defects are found, replace the front seatback pad with cover with a new one. |
| Rear seat airbag assembly*1 | 1.
Perform a diagnostic system check. 2.
Visually check for defects with the rear seat airbag assemblies installed to the vehicle.
If any defects are found, replace the bench type rear seatback pad or bench type rear seatback cover with a new one. |
| Front seat outer belt assembly | 1.
Perform a diagnostic system check. 2.
Visually check for defects with the front seat outer belt assemblies installed to the vehicle.
If any defects are found, replace the front seat outer belt assembly with a new one. |
| Rear seat outer belt assembly | 1.
Perform a diagnostic system check. 2.
Visually check for defects with the rear seat outer belt assemblies installed to the vehicle.
If any defects are found, replace the rear seat outer belt assembly with a new one. |
| Airbag ECU assembly | 1.
Perform a diagnostic system check. |
| Front airbag sensor | |
| Side airbag pressure sensor | |
| No. 1 side airbag sensor | |
| Harness and connector |
*1: w/ Rear Seat Airbag Assembly