SLIDING ROOF / CONVERTIBLE SLIDING ROOF HOUSING(for Panoramic Moon Roof) DISASSEMBLY
CAUTION / NOTICE / HINT
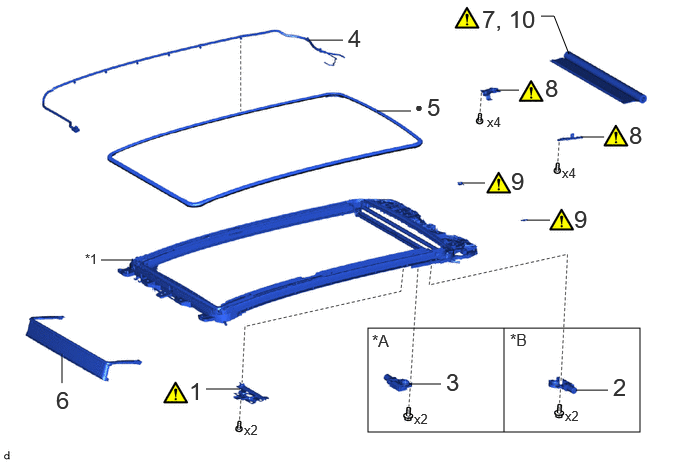
| Procedure | Part Name Code | 
|

|

|
|
|---|---|---|---|---|---|
| 1 | ROOM LIGHT BRACKET | 63231C | ( 202201,999999,_59,_114986,_0509983,RM10000000207A7_01_0001,) 202201,999999,_59,_114986,_0509983,RM10000000207A7_01_0001,)
|
- | - |
| 2 | SLIDING ROOF DRIVE GEAR ASSEMBLY | 63260H | - | - | - |
| 3 | SLIDING ROOF DRIVE GEAR ASSEMBLY | 63260J | - | - | - |
| 4 | NO. 2 ROOF WIRE | 82172 | - | - | - |
| 5 | SLIDING ROOF WEATHERSTRIP | 63251H | - | - | - |
| 6 | ROOF WIND DEFLECTOR PANEL SUB-ASSEMBLY | 63209 | - | - | - |
| 7 | SEPARATE SUNSHADE TRIM SUB-ASSEMBLY | 63306 | (202201,999999,_59,_114986,_0509983,RM10000000207A7_01_0012,)
|
- | - |
| 8 | SUNSHADE TRIM BRACKET | - | (202201,999999,_59,_114986,_0509983,RM10000000207A7_01_0016,)
|
- | - |
| 9 | SUNSHADE PLATE | - | (202201,999999,_59,_114986,_0509983,RM10000000207A7_01_0015,)
|
- | - |
| 10 | REMOVE SUNSHADE TRIM SUB-ASSEMBLY | 63306 | - | - | - |
| *A | for Roof Sunshade | *B | for Sliding Roof Glass |
| *1 | SLIDING ROOF HOUSING SUB-ASSEMBLY | - | - |
| ● | Non-reusable part | - | - |
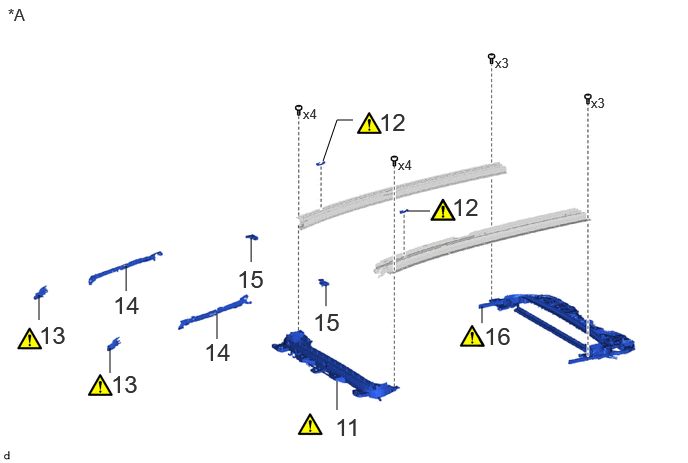
| Procedure | Part Name Code |
|
|
|
|
|---|---|---|---|---|---|
| 11 | FRONT SLIDING ROOF HOUSING PANEL | 63233C | (202201,999999,_59,_114986,_0509983,RM10000000207A7_01_0011,)
|
- | - |
| 12 | STOPPER | - | (202201,999999,_59,_114986,_0509983,RM10000000207A7_01_0020,)
|
- | - |
| 13 | RAIL END | - | (202201,999999,_59,_114986,_0509983,RM10000000207A7_01_0021,)
|
- | - |
| 14 | SLIDING ROOF DRIVE CABLE SUB-ASSEMBLY | - | - | - | - |
| 15 | SHADE SHOE | - | - | - | - |
| 16 | REAR SLIDING ROOF HOUSING PANEL | 63233C | (202201,999999,_59,_114986,_0509983,RM10000000207A7_01_0009,)
|
- | - |
| *A | for GTMC Made | - | - |
PROCEDURE

 63231C
1.REMOVE ROOM LIGHT BRACKET
63231C
1.REMOVE ROOM LIGHT BRACKET
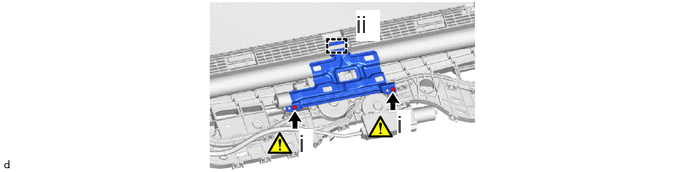
Using a T25 "TORX" socket wrench, remove the 2 screws.
Disengage the guide to remove the room light bracket.
63260H
2.REMOVE SLIDING ROOF DRIVE GEAR SUB-ASSEMBLY (for Sliding Roof Glass)

63260J
3.REMOVE SLIDING ROOF DRIVE GEAR SUB-ASSEMBLY (for Roof Sunshade)

82172
4.REMOVE NO. 2 ROOF WIRE
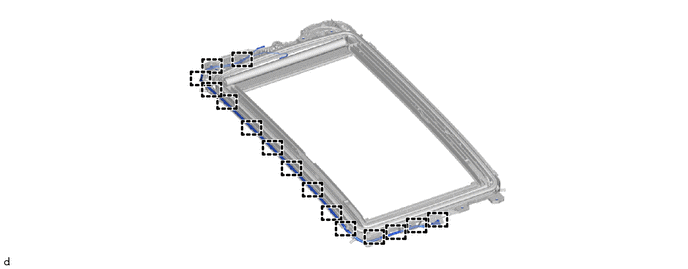
63251H
5.REMOVE SLIDING ROOF WEATHERSTRIP
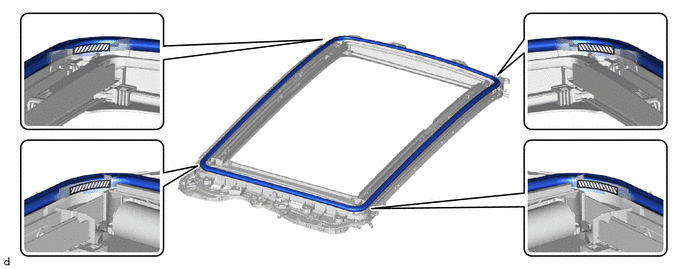

|
Double-sided Tape | - | - |
63209
6.REMOVE ROOF WIND DEFLECTOR PANEL SUB-ASSEMBLY
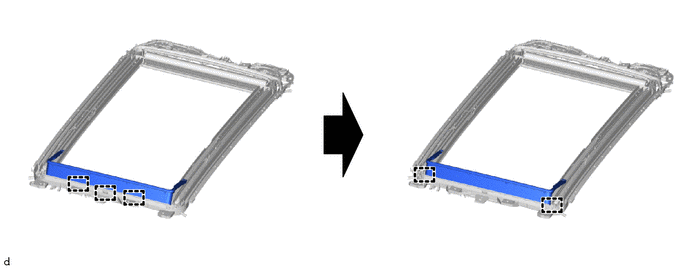
63306
7.SEPARATE SUNSHADE TRIM SUB-ASSEMBLY
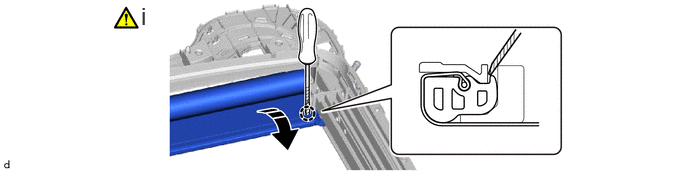

|
Remove in this Direction | - | - |
Using a screwdriver with its tip wrapped with protective tape, disengage the claw to separate the sunshade trim sub-assembly as shown in the illustration.
Use the same procedure as for the opposite side.
8.REMOVE SUNSHADE TRIM BRACKET
for LH Side:
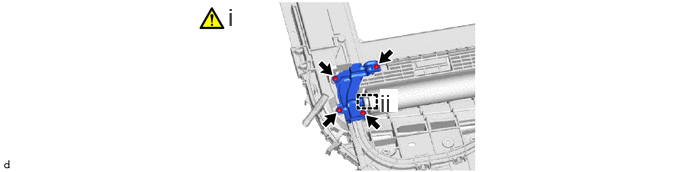
Using a T25 "TORX" socket wrench, remove the 4 screws.
Disengage the pin to remove the sunshade trim bracket.
for RH Side:
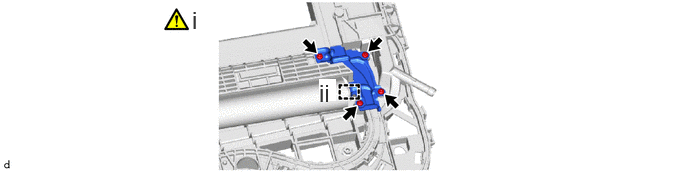
Using a T25 "TORX" socket wrench, remove the 4 screws.
Disengage the guide to remove the sunshade trim bracket.
9.REMOVE SUNSHADE PLATE
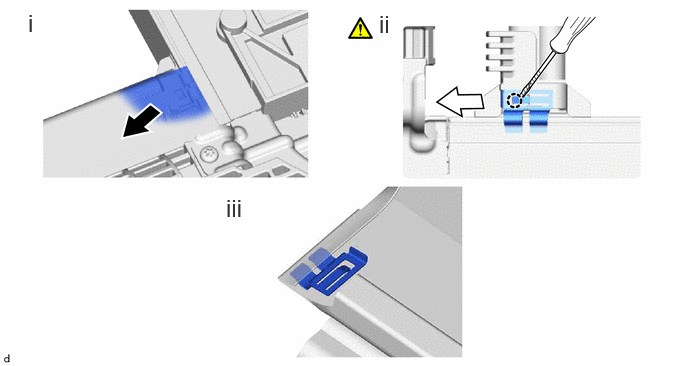
Move the sunshade trim sub-assembly as shown in the illustration.
Using a screwdriver with its tip wrapped with protective tape, disengage the claw to separate the sunshade plate as shown in the illustration.
Remove the sunshade plate.
Use the same procedure as for the opposite side.
63306
10.REMOVE SUNSHADE TRIM SUB-ASSEMBLY
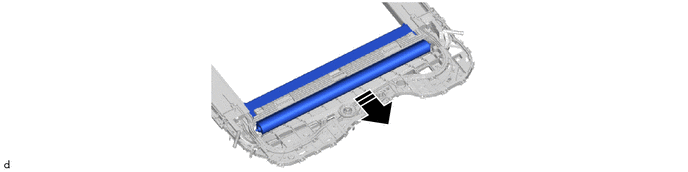
|
|
Remove in this Direction | - | - |
63233C
11.REMOVE FRONT SLIDING ROOF HOUSING PANEL (for GTMC Made)
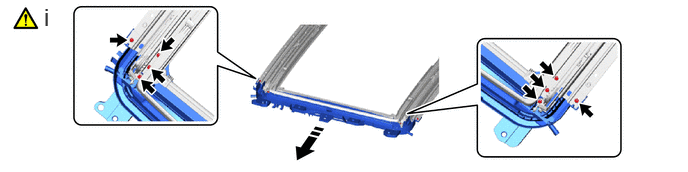
|
|
Remove in this Direction | - | - |
Using a T25 "TORX" socket wrench, remove the 8 screws and front sliding roof panel sub-assembly as shown in the illustration.
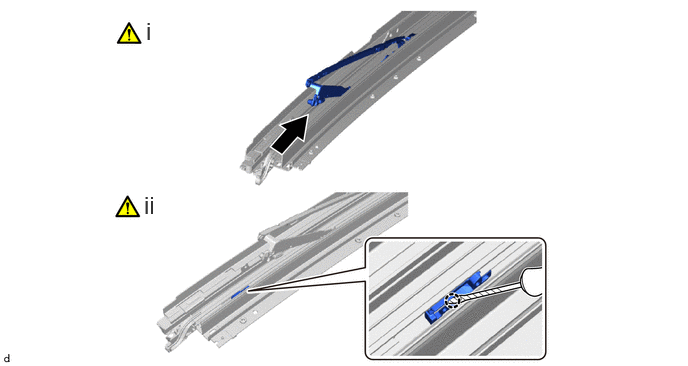
12.REMOVE STOPPER (for GTMC Made)
|
|
Move in this Direction | - | - |
Move the sliding roof drive cable sub-assembly to the position where the stopper is visible as shown in the illustration.
Using a screwdriver with its tip wrapped with protective tape, disengage the claw to remove the stopper.
Use the same procedure as for the opposite side.
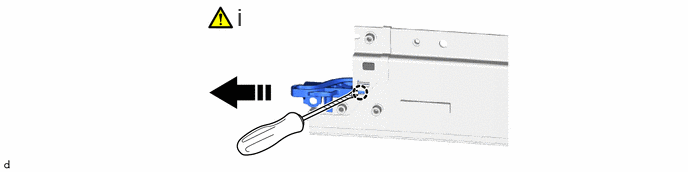
13.REMOVE RAIL END (for GTMC Made)
|
|
Remove in this Direction | - | - |
Using a screwdriver with its tip wrapped with protective tape, disengage the claw to remove the rail end as shown in the illustration.
Use the same procedure as for the opposite side.
14.REMOVE SLIDING ROOF DRIVE CABLE SUB-ASSEMBLY (for GTMC Made)
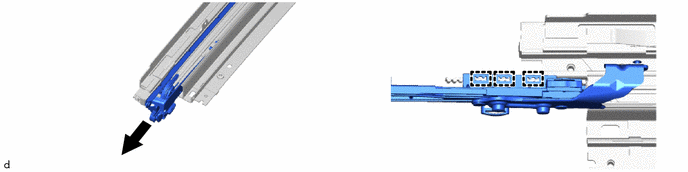
Use the same procedure as for the opposite side.
15.REMOVE SHADE SHOE (for GTMC Made)
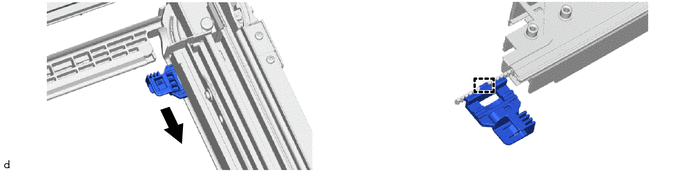
Use the same procedure as for the opposite side.
63233C
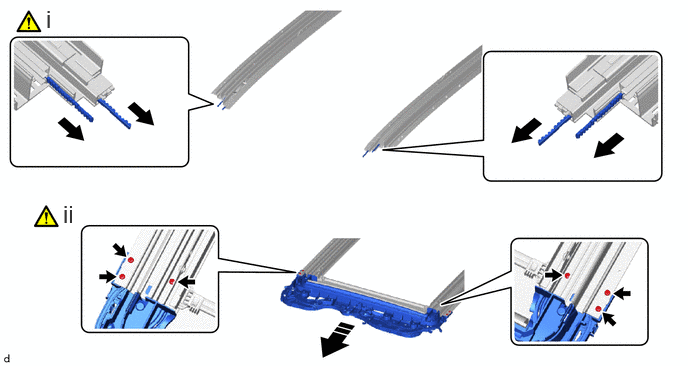
16.REMOVE REAR SLIDING ROOF HOUSING PANEL (for GTMC Made)
|
|
Move in this Direction | - | - |
Move the 4 sliding roof drive cables to the position where the rear sliding roof panel sub-assembly can be removed as shown in the illustration.
- NOTICE:
-
Do not remove the sliding roof drive cable.
Using a T25 "TORX" socket wrench, remove the 6 screws and rear sliding roof panel sub-assembly as shown in the illustration.